Building a Temperature-Controlled Fan System with Arduino
In this tutorial, we will guide you through the process of building a temperature-controlled fan system using Arduino. This project is perfect for electronics enthusiasts looking to cool down components or create a custom climate control solution.
Overview
Temperature control is crucial in many electronics projects, and automating it with an Arduino is both efficient and fun. In this guide, we’ll use a temperature sensor, a DC fan, and an Arduino to create a system that adjusts the fan speed based on the ambient temperature.
What is a Temperature-Controlled Fan System?
Temperature controlling is required in many places such as server rooms, houses, industries, etc. This project can be very useful in understanding the basics of how you can control the temperature at your home. You can take this as a DIY project which can be used anywhere. Here, the temperature-controlled fan will respond to temperature changes.
Components Needed
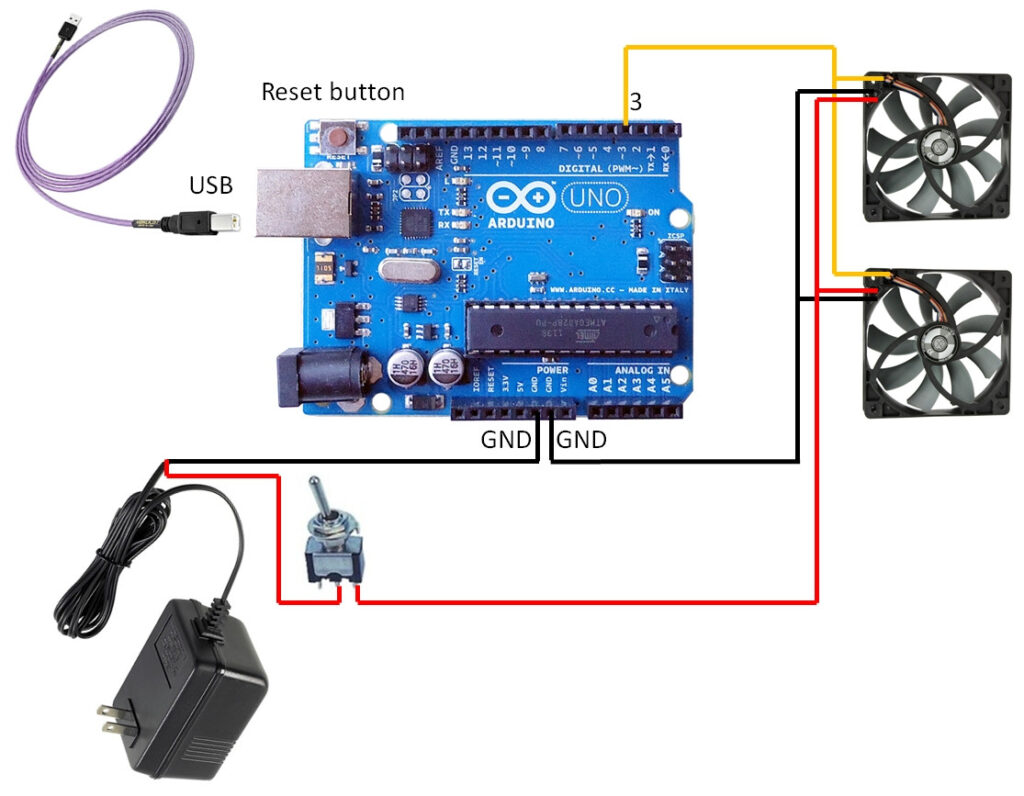
Wiring Diagram
Below is a simple wiring diagram to connect your components. Make sure to follow it closely to avoid any mistakes:

Step-by-Step Guide
- Connect the Components: Start by connecting the temperature sensor to the Arduino. Attach the VCC, GND, and output pins to the respective Arduino pins. Next, connect the DC fan through the NPN transistor, which acts as a switch controlled by the Arduino.
- Upload the Arduino Code: Use the code below to program your Arduino. The code reads the temperature and adjusts the fan speed using PWM (Pulse Width Modulation).
// Arduino code to control fan speed based on temperature
int tempPin = A0; // Analog pin for temperature sensor
int fanPin = 9;   // PWM pin for fan control
int tempThreshold = 30; // Temperature threshold in Celsius

void setup() {
    pinMode(fanPin, OUTPUT);
    Serial.begin(9600);
}

void loop() {
    int tempValue = analogRead(tempPin);
    float voltage = tempValue * (5.0 / 1023.0);
    float temperature = (voltage - 0.5) * 100; // Convert voltage to temperature

    Serial.println(temperature);

    // Control fan speed based on temperature
    if (temperature > tempThreshold) {
        int fanSpeed = map(temperature, tempThreshold, 50, 0, 255); // Map temperature to fan speed
        analogWrite(fanPin, fanSpeed);
    } else {
        analogWrite(fanPin, 0); // Turn off fan if below threshold
    }

    delay(1000);
}
Tips and Best Practices
- Ensure all connections are secure and double-check the polarity of the components.
- Use a heat sink on the transistor if you plan to run the fan at high speeds for extended periods.
- Consider adding a display to monitor the temperature and fan speed in real-time.
Conclusion
Building a temperature-controlled fan system with Arduino is a practical and rewarding project. It’s an excellent way to learn more about temperature sensors, PWM, and transistor circuits. With some customization, you can adapt this project to various cooling needs.
Troubleshooting Tips
- Double-check wiring connections for accuracy.
- Ensure power is supplied to the fan, and the transistor is connected correctly.
- Use the Serial Monitor to debug and print temperature readings and threshold.
